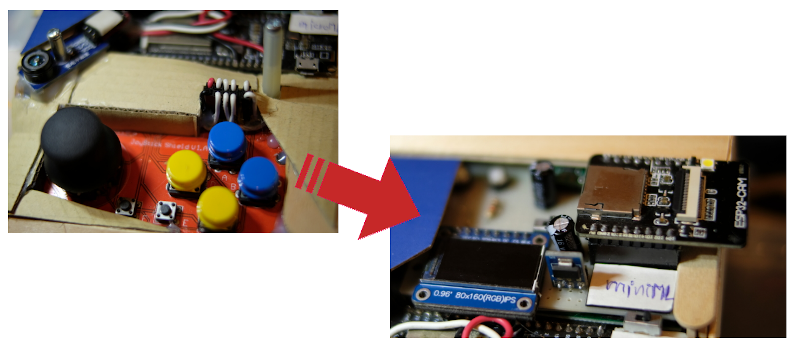
[EN] Arduino: Joystick Module

This article is programming to write a program to use the joystick module as shown in Figure 1, in which the module can tell the X-axis movement, Y-axis movement, and the state of pressing the switch on the joystick. An example of this module is to use the esp32 board using C++ to connect to the GPIO using the commands mentioned in this article.
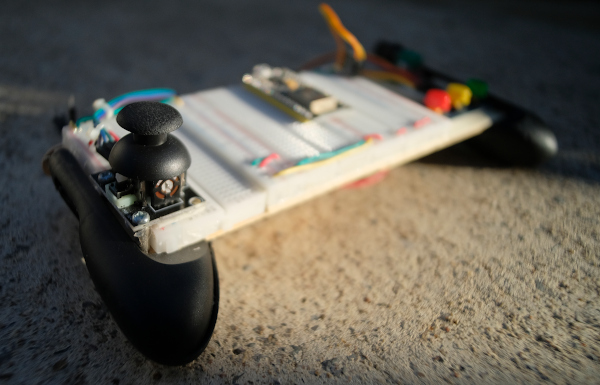
(Figure. 1 esp32 with joystick

[TH] ESP-IDF Ep.10 : Control the Servo Motor with LEDC.

บทความนี้กล่าวถึงการใช้งานโมดูลเซอร์โวมอเตอร์ด้วยการใช้ GPIO ของ ESP32 ที่นำออกสัญญาณดิจิทัลแบบ PWM หรือ Pulse Width Modulation หรือ LEDC (LED Control) ซึ่งทำให้สามารถสร้างคลื่นความถี่ หรือปรับสัดส่วนของสถานะ 1 และ 0 ใน 1 ลูกคลื่น ที่มีความถี่ 50Hz โดยใช้บอร์ดทดลองดังภาพที่ 1

ภาพที่ 1 การต่อใช้งานประกอบตัวอย่างการใช้งาน LEDC

[EN] PyQt5

This article provides an example of opening a window and using a button in response to PyQt5, which is the basis for using the other components. The highlight of Qt is that it is a cross-platform C++ development kit and covers the integration for compatibility with languages such as PyQt, “The python binding for the Qt cross-platform C++ framework” developed by Riverbank Computing Limited, currently released in PyQt 6.1.1 (2021-06-29).

[TH] Control movement from a joystick via WiFi with MicroPython.

บทความนี้เกิดจากการนำบทความการเขียนโปรแกรมไคลเอนต์/เซิร์ฟเวอร์สำหรับสถานีอากาศผ่านระบบเครือข่ายไร้สาย หรือ WiFi มาปรับเปลี่ยนจากการอ่านข้อมูลจากเซ็นเซอร์มาเป็นจอยสติกชิลด์ (Arduino Joystick Shield) เพื่อให้กลายเป็นเกมคอนโทรลเลอร์แบบไร้สายโดยใช้ MycroPython กับไมโครคอนโทรลเลอร์ ESP32 ดังภาพที่ 1 ทำให้สามารถควบคุมการเคลื่อนที่ของวัตถุในจอแสดงผลผ่านจอ TFT แบบ ST7735 ที่เชื่อมต่อกับ ESP32 อีกตัวหนึ่งได้ ซึ่งจะพบว่าการใช้งานภาษาไพธอนของ MicroPython นั้นสามารถนำมาใช้งานได้กับกรณีตัวอย่างนี้ และด้วยภาษาที่เขียนได้ง่ายประกอบกับสามารถปรับแก้โค้ดได้โดยไม่ต้องคอมไพล์และอัพโหลดใหม่จึงสะดวกต่อการเขียนโค้ดต้นแบบเพื่อนำไปพัฒนาให้มีความเร็วในการทำงานที่สูงขึ้นต่อไป

Control movement from a joystick via WiFi
ภาพที่ 1 อุปกรณ์การทดลองในบทความ

[TH] ESP-IDF Ep.9 : LEDC (PWM) Output

บทความนี้กล่าวถึงการใช้งาน GPIO ของ ESP32 เพื่อทำหน้าที่นำออกสัญญาณดิจิทัลแบบ PWM หรือ Pulse Width Modulation หรือ LEDC (LED Control) ซึ่งทำให้สามารถสร้างคลื่นความถี่ หรือปรับสัดส่วนของสถานะ 1 และ 0 ใน 1 ลูกคลื่น ด้วยเหตุนี้ในกรณีที่ไม่มีภาค DAC ผู้เขียนยังคงสามารถปรับค่าเฉลี่ยของแรงดันที่ขานั้นได้ตามที่ต้องการ และสามารถประยุกต์ใช้ในการควบคุมมอเตอร์แบบเซอโวได้อีกด้วย ดังนั้น ในบทความนี้จึงเป็นการเรียนรู้การใช้งาน PWM และประยุกต์เข้ากับการส่งคลื่นความถี่แทน DAC  (จากบทความที่แล้ว) และการหรี่หลอดแอลอีดี โดยใช้บอร์ดทดลองดังภาพที่ 1

LEDC / PWM Labs.
ภาพที่ 1 การต่อใช้งานประกอบตัวอย่างการใช้งาน LEDC

[EN] Arduino: STM32F030F4P6

This article is about using a 32-bit microcontroller board under the Cortex-M0 architecture RISC that is economical but the performance is considerably better than the 8-bit board. However, our team has created an alternative for those who are interested in reading. The article starts with the content about the features of microcontrollers, board installation for Arduino IDE to know and example code to toggle LED, traffic through the USART communication port and Prime numbering test to see the processing speed in an iterative loop.

(Figure. 1 STM32F030F4P6)

[TH] ESP-IDF Ep.8 : DAC Output Part 2

บทความนี้กล่าวถึงการใช้งาน GPIO ของ ESP32 เพื่อทำหน้าที่นำออกสัญญาณแอนาล็อกผ่านทางโมดูล DAC ขนาด 8 บิตของไมโครคอนโทรลเลอร์ ESP32 ต่อจากคราวที่แล้ว โดยในบทความนี้เป็นการใช้การสร้างคลื่นแบบ Cosine เพื่อนำออกสัญญาณแอนาล็อกของไมโครคอนโทรลเลอร์ผ่านลำโพง และแสดงให้เห็นรูปของคลื่นที่ได้จากจอแสดงผลของออสซิโลสโคป ส่วนบอร์ดทดลองยังคงใช้ตามภาพที่ 1

ภาพที่ 1 การต่อใช้งานประกอบตัวอย่างการใช้งาน DAC

[EN] Arduino:ET-BASE AVR EASY4809

This article is the use of ETT‘s ET-BASE AVR EASU4809 board based on Microchip’s ATMEGA4809 microcontroller, which is used as an Arduino board running at 20MHz with 40KB FLASH ROM, 256 bytes EEPROM, 6KB of RAM, and a 10-bit ADC, which is said to have significantly higher features than the ATmega 368P used with the Arduino Uno or Arduino Nano. In addition, the board selected this time has more features than basic Arduino boards which you can read further from the web page of the board.

(Figure. 1 ET-BASE AVR EASY4809)

[TH] ESP-IDF Ep.7 : DAC Output

บทความนี้กล่าวถึงการใช้งาน GPIO ของ ESP32 เพื่อทำหน้าที่นำออกสัญญาณแอนาล็อกผ่านทางโมดูล DAC ขนาด 8 บิตของไมโครคอนโทรลเลอร์ ESP32 โดยทดลองสร้างเป็นกราฟฟันปลา (ดังภาพที่ 7) เพื่อส่งแรงดันดังกล่าวไปยังโมดูลลำโพงดังภาพที่ 1

ภาพที่ 1 การต่อใช้งานประกอบตัวอย่างการใช้งาน DAC