[EN] ESP-IDF Ep.10 : Control the Servo Motor with LEDC.

This article discusses the implementation of a servo motor module using the ESP32’s GPIO that outputs a digital PWM signal or Pulse Width Modulation or an LEDC (LED Control) which enables frequency band generation or adjust the proportion of status 1 and 0 in 1 waveform with a frequency of 50Hz using the experimental board as shown in Figure 1.

(Figure. 1 LEDC connection)

[TH] Arduino: ใช้ SoftwareSerial กับ STM32F030F4

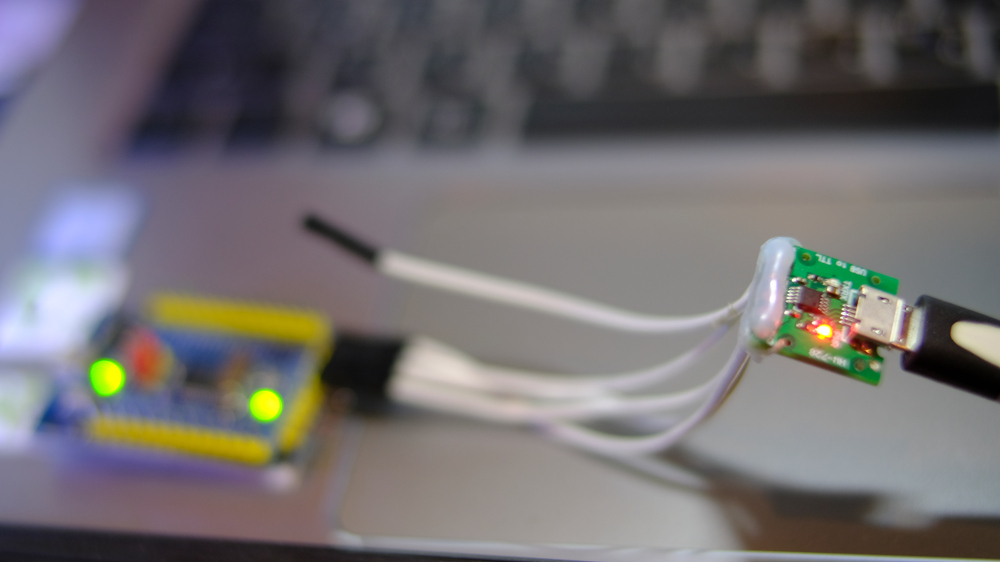
จากบทความแนะนำการใช้บอร์ด STM32F030F4P6 ที่ใช้การสื่อสารพอร์ตอนุกรมด้วยการใช้ไลบรารีเพิ่มเติมซึ่งทำให้ปริมาณหน่วยความจำไม่มากพอสำหรับใช้งาน ทางเราเลยลองเปลี่ยนมาใช้ SoftwareSerial ของเฟรมเวิร์ก Arduino และใช้ขา PA10 และ PA9 ต่อเข้ากับ RX และ TX ของโมดูลแปลง USB-RS232 ดังภาพที่ 1 และทดลองใช้งานตามการตั้งค่าของ Arduino IDE ดังภาพที่ 2 พร้อมทั้งสั่ง Toggle หลอด LED ที่เชื่อมต่อกับขา PA4 พบว่า เมื่อคอมไพล์โปรแกรมตัวอย่างแล้วมีการใช้ ใช้หน่วยความจำ ROM และ RAM เป็น 80% และ 21% ตามลำดับดังการรายงานจาก Arduino IDE ดังต่อไปนี้

Sketch uses 13188 bytes (80%) of program storage space. Maximum is 16384 bytes.
Global variables use 876 bytes (21%) of dynamic memory, leaving 3220 bytes for local variables. Maximum is 4096 bytes.
ภาพที่ 1 บอร์ด STM32F030F4P6 กับโมดูล CH340E

[TH] การใช้ GPS ใน Unity3D

จากบทความ Unity3D ครั้งที่แล้วได้กล่าวถึงฟีเจอร์บางส่วนในโปรแกรม ในบทความนี้จึงขอกล่าวฟีเจอร์หนึ่งที่น่าสนใจ คือการใช้งาน GPS ใน Unity3D โดยเฉพาะผู้เริ่มต้นใหม่ เนื่องจากในโปรแกรมมีการใช้งาน GPS ที่ค่อนข้างง่าย

[EN] Control movement from a joystick via WiFi with MicroPython.

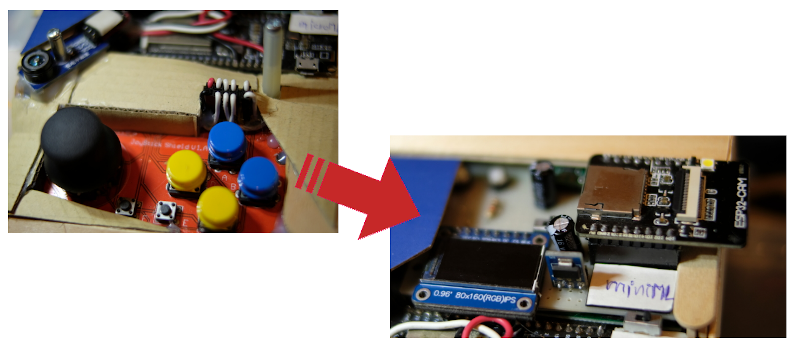
This article is based on the article programming a client/server for a weather station over a wireless network or WiFi to modify from reading data from sensors to joystick shield (Arduino Joystick Shield) so that it has become a wireless game controller using MicroPython and an ESP32 microcontroller as shown in Figure 1. It is possible to control the movement of objects in the display via a ST7735 TFT screen connected to another ESP32. It will be found that the Python implementation of MicroPython is applicable in this example. And with an easy-to-write language and code that can be modified without recompiling and uploading, it’s easy to write prototype code for further development at a higher speed.

Control movement from a joystick via WiFi
(Figure. 1 Our board)

[TH] Arduino: ควบคุมการเคลื่อนที่หุ่นยนต์รถผ่านบราวเซอร์ด้วย esp8266

จากบทความการควบคุมหุ่นยนต์รถ 2 ล้อแบบ Servo ใน ESP8266+RoboServo และมอเตอร์ไฟฟ้ากระแสตรงใน VisionRobo Car: Drive Motor ทางเราได้นำหุ่นยนต์รถในตัวที่ 2 เปลี่ยนจาก Raspberry Pi เป็น ESP8266 เพื่อสั่งงานผ่าน WiFi โดยใช้แนวทางจาก บทความ ESP-01s+Relay มาเขียนใหม่ด้วยภาษา C/C++ ของ Arduino ด้วยคลาส WebServer จากที่ในบทความของ ESP8266 เป็น MicroPython ดังนั้น เมื่อทำตามบทความนี้จนเสร็จจะสามารถสั่งงานหุ่นบนต์ในภาพตัวอย่างที่ 1 ได้ด้วยการเชื่อมต่อโทรศัพท์หรืออุปกรณ์สื่อสารไปที่ 192.168.4.1 และสั่งให้เดินหน้า ถอยหลัง เลี้ยวซ้าย เลี้ยวขวา หรือหยุดได้

ภาพที่ 1 ตัวอย่างหุ่นยนต์รถสำหรับการทดลองในบทความนี้