[EN] Arduino: STM32F103CBT6 ADC&LDR.

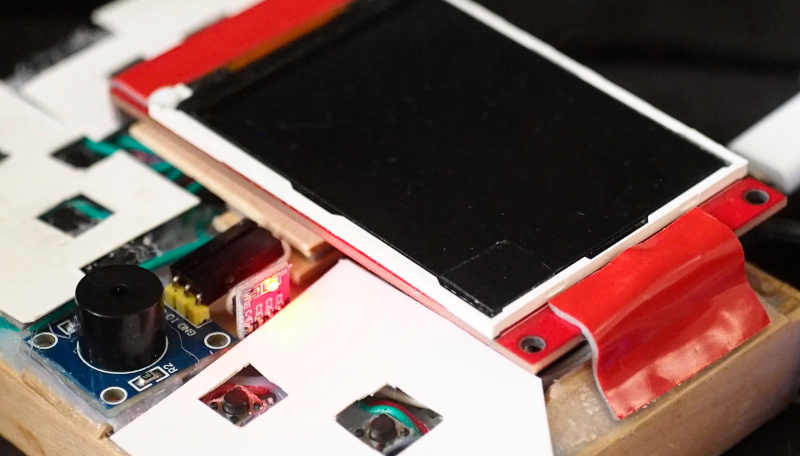
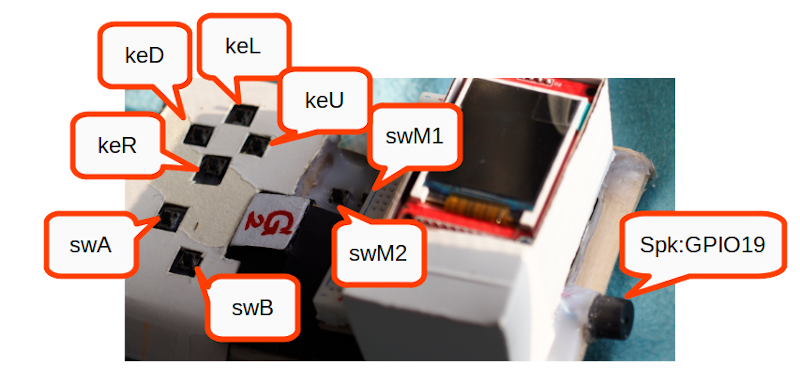
From reading articles on how to use board STM32L432 ADC and articles about STM32F103x connecting to ST7735S, it’s time to take STM32F103CBT6 or Blue-Pill/Black-Pill board. Let’s write a program to use ADC to display on a TFT screen. The example of the result of this article is as shown in Figure 1, which is reading from Pin PA0 that has been connected to Pin Analog signal from Board LDR in Figure 2 to Displayed on a TFT display.

Figure 1 Our board’s operation

[TH] PIC18F458 Ep.4 GPIO

หลังจากที่ได้สร้างโครงงานและโค้ดโปรแกรมเบื้องต้นจากบทความการใช้ MPLAB X IDE ไปก่อนหน้านี้ บทความนี้เป็นการใช้งานไมโครคอนโทรลเลอร์เพื่อใช้เป็นหน่วยนำออกสัญญาณหรือการ Output และนำเข้าสัญญาณหรือ Input ผ่านทางพอร์ตของ PIC18F458 ทั้งพอร์ต A, B, C และ D ผ่านทางวงจร LED และ Switch

ภาพที่ 1 บอร์ดทดลองแล็บสถาปัตยกรรมกับการทดลองใช้งาน GPIO

[EN]Calculate Regression with NumPy.


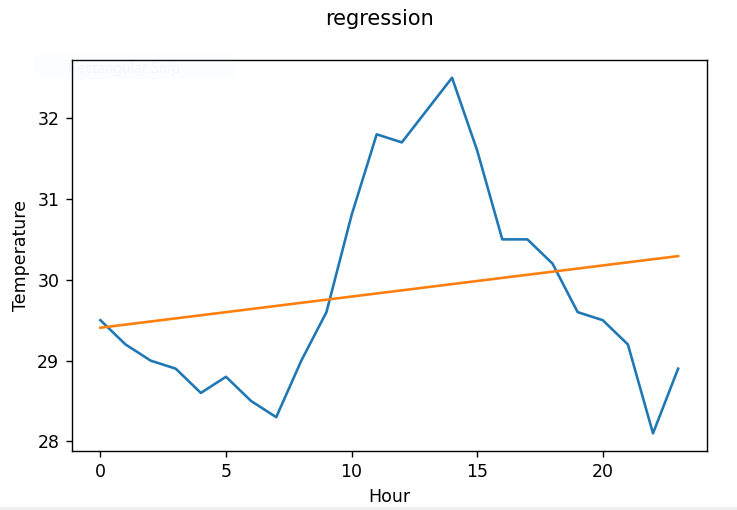
This article is to convert the implementation of the regression model from the article of ESP32-C3 to NumPy on Raspberry Pi and PC and use the display as Matplotlib, as shown in Figure 1, which can be found from the previous article. The temperature and humidity from the 1-day data were obtained from parameters a and b of the regression equation and the resulting equation or model was used to determine the possible temperature values over the 1 day.

Figure 1 Result of the program

[TH] PIC18F458 Ep.3 An Introduction to Using MPLAB X IDE with XC8.

บทความนี้เป็นการใช้งานชุดพัฒนาโปรแกรม MPLAB X IDE (ดังภาพที่ 1) เพื่อใช้กับไมโครคอนโทรลเลอร์แบบ 8 บิตของบริษัท Microchip ด้วยภาษา C ผ่านทางเครื่องมือแปลภาษาที่เรียกว่า XC8 เพื่อเป็นพื้นฐานเบื้องต้นสำหรับการใช้งานในบทความต่อไป ซี่งขั้นตอนการพัฒนาโปรแกรมด้วยเครื่องมือชุดนี้มีขั้นตอนดังนี้

  1. สร้างไฟล์โครงงานและกำหนดประเภทของชิพไมโครคอนโทรลเลอร์เป็น PIC18F458
  2. สร้างไฟล์ภาษา C สำหรับชุดแปลภาษา XC8
  3. สร้างข้อมูลเกี่ยวกับการตั้งค่าไมโครคอนโทรลเลอร์เพื่อนำมาแปะเข้ากับโค้ดโปรแกรม
  4. คอมไพล์โปรแกรม
  5. นำไฟล์ที่ได้นั้นไปอัพโหลดเข้าบอร์ดผ่านทางเครื่องมือ PICKit2 หรือใหม่กว่า
ภาพที่ 1 หน้าต่างโปรแกรม MPLAB X IDE + XC8

[EN] Blender : Animation Tab

This article discusses how to create a basic animation from Blender (We used version 3.0) to create the movement of the robot arm as shown in Figure 1. The content of this article introduces Animation Tab, model preparation, and put on the skeleton and Key Frame animation as a basic guide for those interested in creating further animations.

Figure 1 Mechanical arm example

[EN] Unity3D The great game maker

This article introduces Unity3D, a very popular game creation program. Because there are so many facilities needed to make a game. Called quite complete, such as the manipulation of three-dimensional objects, gravity, system movement of objects, can create games on multiple platforms for example. Controlling objects requires knowledge of a programming language which can be practiced.

Figure 1 Unity’s logo

[EN] Play the Wav File with ESP32.

This article applies the ESP32 microcontroller’s DAC and MicroPython to open WAV files, which are audio recording files and exported to the DAC connected to the speakers as shown in Figure 1. The used file is an uncompressed 8-bit mono PCM audio file. And the sample program supports a sampling rate at about 50KHz or at 44100 level.

Figure 1 An example of a board to test the functionality of an article

[TH] Office Syndrome our series : PIRIFORMIS SYNDROME

บทความนี้เป็นบทความต่อเนื่องเกี่ยวกับการดูแลร่างกายสำหรับคนที่ทำงานหน้าจอคอมพิวเตอร์นานๆ หรือสำหรับคนที่มีปัญหาจากการนั่งนานๆ ซึ่งพูดถึงกล้ามเนื้อ Piriformis ลักษณะอาการ สาเหตุ และวิธีบรรเทาให้อาการลดลง

ภาพที่ 1 กล้ามเนื้อ Piriformis
จาก www.dreamstime.com