In the previous article, we introduced the boards used in computer architecture labs and the software used in practice. This time, we will discuss the features and diagrams inside the PIC18F458 from Microchip‘s documentation as a basis for programming the capabilities of the microcontroller in the next article (The details of the PIC16F877 can be read from this article.).
This article is a continuation of the article on how to take care of the body for people who work in front of the computer for a long time or people who have problems from sitting for a long time. This talks about the piriformis muscle, its symptoms, causes, and how to relieve it.
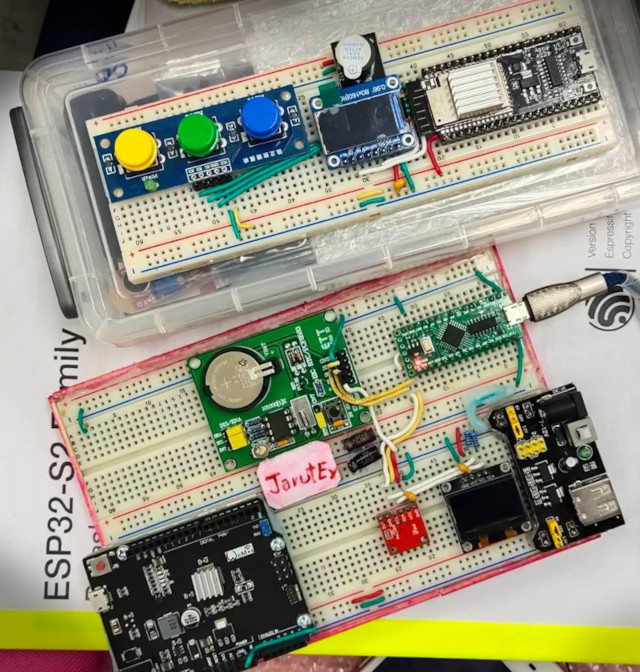
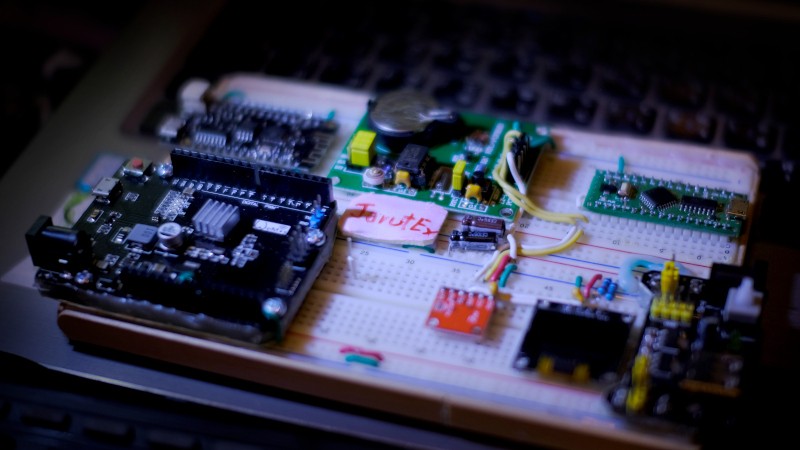
This article describes Queue Data Structures previously written in the Python Queue Data Structure article and is frequently used with the MicroPython example, but this article is written in C via Arduino IDE to use with microcontroller board LGT8F328P, SAM-D21, ESP8266, ESP32 and ESP32-S2 as shown in Figure 1 by using an example of the array structure and a single link list as a queued data structure. This article is probably the last article on JarutEx.
This article describes a stack data structure to write programs in C on various platforms using a single linked list data structure as a stack data store with examples of the array as storage and test the operation with the microcontroller board LGT8F328P, SAM-D21, ESP8266, ESP32 and ESP32-S2 as shown in Figures 1 and 2. In case of wanting to use with other platforms, you can still modify the code for use such as the same.
As for the ultimate game creation program like Unity3D, it has a lot to offer as mentioned before. One of which is that the program can create games on almost every platform such as computer or mobile. This article will talk about the use on mobile phones. Of course, there must be a component that the computer does not have, such as a camera, which will discuss how to scan a QR Code to operate according to the text that can be extracted and ordered it to be rendered as a 3D object.
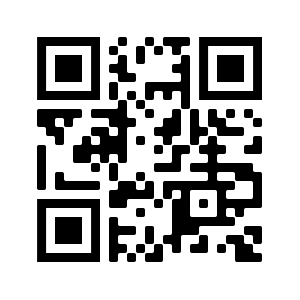
QR Code
Introductory bit for everyone to understand that QR Code is similar to Barcode, that is, the text is converted into a specified format which looks like a square. There are three direction points to know which side is the top and use the program to scan to extract text which can be letters, numbers, various characters, links, etc.
To decode a QR code to text, you can either scan it with a camera or save an image and use a decoder.
Figure 1 QR code of text “Hello world!! we are Jarutex!!”
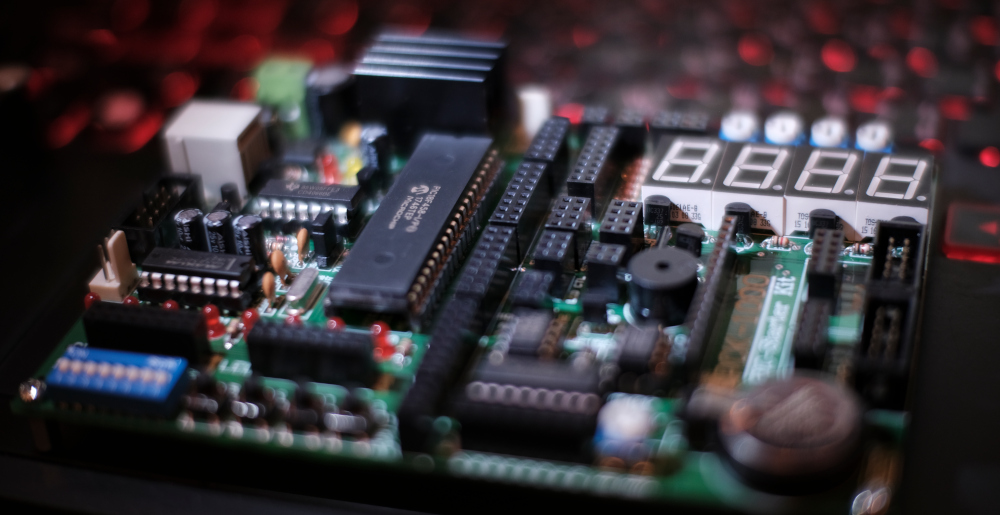
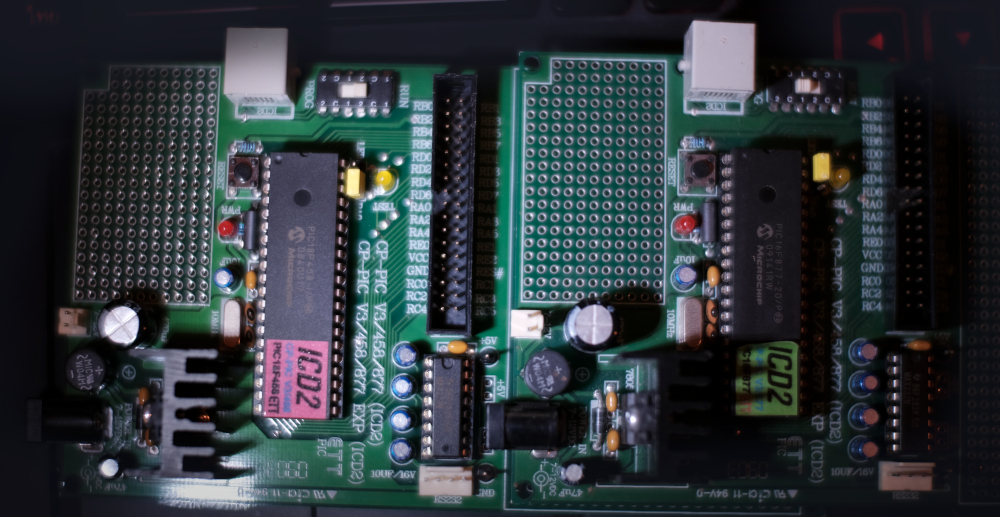
This article is about the use of an 8-bit PIC family of PIC microcontrollers PIC18F458 and PIC16F877 which are RISC type microcontrollers like AVR family microcontrollers and we have published a book on PIC using BASIC language (or order from Shoppee). This article, will be in C language and the board used as shown in Figures 1 and 2, but for the laboratory of the Faculty of Information Technology Phetchaburi Rajabhat University, choose a board for learning in the course of computer architecture as shown in Figure 2, and use a set of chip programs as shown in Figure 3. Article part 1 (Board CP-PIC V3/458 or CP-PIC V3/877), is an introduction to the features of the microcontroller and appearance of the laboratory test board. The use of the different parts of the PIC will be discussed in the next article.
From previous articles, all of you probably know that the team has experimented with Microcontroller including creating games. But in addition to that, the team is also experimenting with 3D printing. In this article, we will talk about 3D printing in brief.
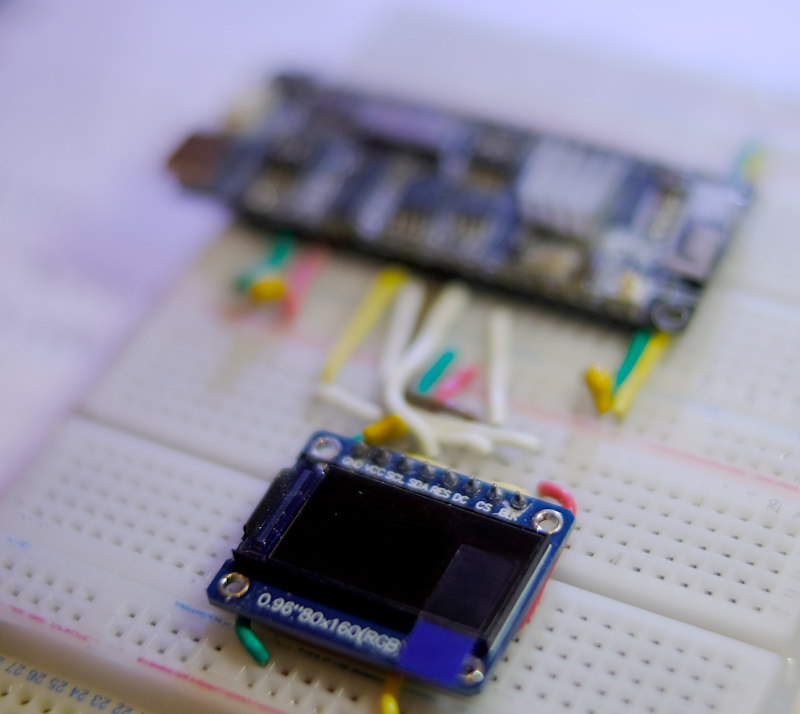
This article describes the use of the ST7735s module with the ESP32-S2 microcontroller via the TFT_eSPI library. We have previously discussed its implementation with the ESP32 and STM32F103C microcontrollers, and the chosen TFT module as REDTAB80x160 (added code for GREENTAB80x160 at the end of the article), but you can adjust the settings to other modules, see the User_Setup.h file of the TFT_eSPI library as shown in Figure 1.