This article discusses compiling and using MicroPython for an esp32-s2 microcontroller based on the TTGO ESP32-S2 V1.1 or TTGO ESP32-S2-WOOR V1.1 board with a Type-C USB port and supports operation via CH340C and OTG by using a dip switch as shown in Figure 1, enabling MicroPython to be used because the chip program uses the CH340’s circuit programming and Python programming requires a port that works like OTG

TTGO ESP32-S2 V1.1
TTGO ESP32-S2 V1.1 มีคุณสมบัติเป็นดังนี้
- espressif-esp32-s2
- 4MB flash memory
- 320KB SRAM
- 8MB SPIRAM
- button
- Power Switch
- Reset button
- Boot button
- Customize
- DPI Switch
- microSD reader
- USB-to-TTL module with CH340C
- XTal on 32.768KHz board
- voltage 2.7V-3.6V
- working temperature -40℃ ~ +85℃
- external battery circuit
- 5V 1A on USB
- 500mA for battery charger
- compatible battery 3.7-4.2V
- external antenna
Steps
Before compiling, the reader must have the ESP-IDF set, which can be read from the previous article or from the example of compiling for ESP32 via WSL when the compiler is already installed in the system, it comes to the procedure for compiling MicroPython is as follows.
Download
Download the MicroPython source file from github with the following command.
git clone --recurse-submodules https://github.com/micropython/micropython.git
An example of the result of the work is shown in Figure 2.

Once the download is complete, use the command to move into the micropython folder as follows:
cd ~/micropython
Compiling mpy-cross
MicroPython’s python compiler mpy-cross provides bytecode with the extension .mpy which is useful in making the code smaller and easier to implement due to saving ROM/RAM space. It also requires mpy-cross to be compiled in MicroPython itself, so what needs to be done in step 2 is to compile mpy-cross as a tool for compiling MicroPython to another layer by going to mpy-xxx and then doing the following make:
cd mpy-cross
make clean
make
Once compiled, you will find a file named mpy-cross.
Compiling submodules ของ esp32
Now that mpy-cross is in place, the next step is to create a library that will be invoked with esp32-s2 by accessing the ports of the ESP32 as follows:
cd ~/micropython/ports/esp32
After that, compile with the following command
make  clean
make  submodules
Compiling MicroPython
คำสั่งสำหรับคอมไพล์ MicroPython เพื่อใช้กับ ESP32-S2 คือ กำหนดให้บอร์ดที่ใช้งานเป็น ESP32_S2_WROVER ดังนี้
make BOARD=ESP32_S2_WROVERThe command for compiling MicroPython for use with the ESP32-S2 is to set the board to be ESP32_S2_WROVER as follows:
Upload
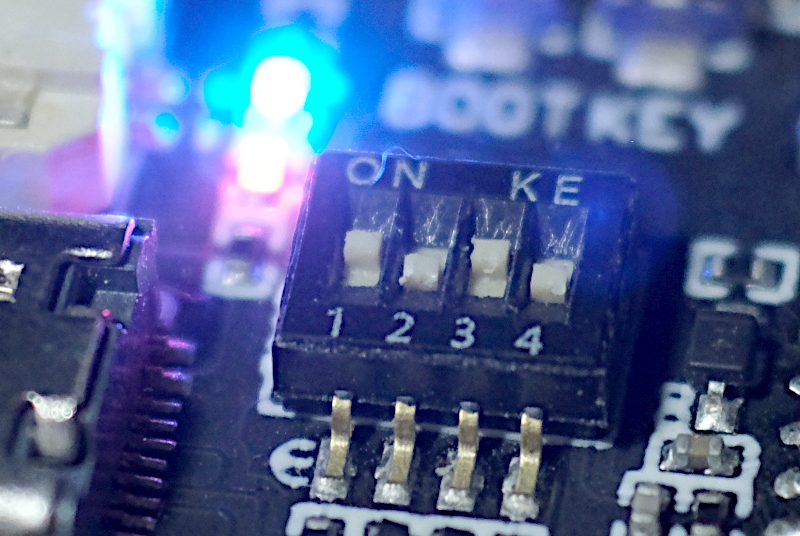
Once compiled, the next step is to upload it to the board which must check the settings of the switch to be as shown in Figure 3, after that, order as follows
~/.espressif/python_env/idf4.4_py3.8_env/bin/python ../../../esp-idf/components/esptool_py/esptool/esptool.py -p (PORT) -b 460800 --before default_reset --after no_reset --chip esp32s2 write_flash --flash_mode dio --flash_size detect --flash_freq 80m 0x1000 build-ESP32_S2_WROVER/bootloader/bootloader.bin 0x8000 build-ESP32_S2_WROVER/partition_table/partition-table.bin 0x10000 build-ESP32_S2_WROVER/micropython.bin
Change (PORT) to the port directory, for example /dev/ttyUSB0.
Usage
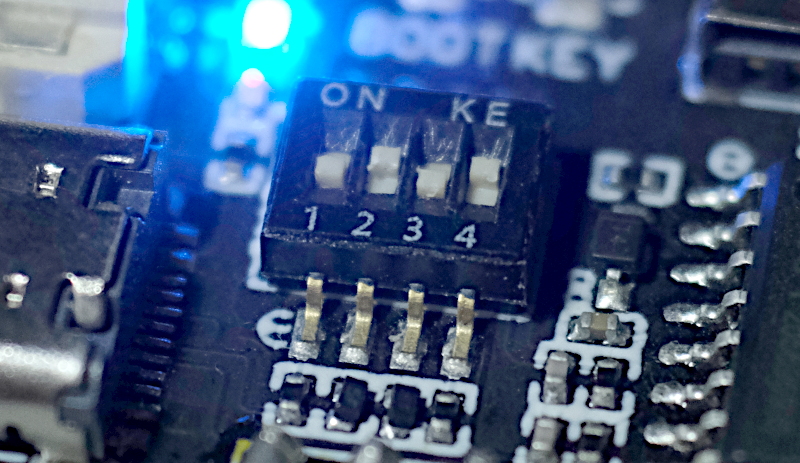
When the firmware is successfully uploaded, change the mode to OTG by sliding the switch Figure 4.
Testing
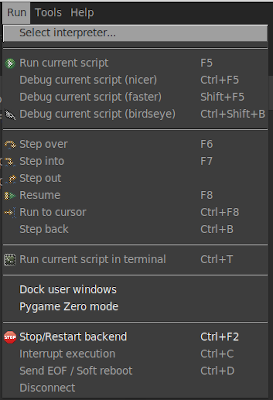
After changing the mode to OTG as shown in Figure 4, supply power to the board. After that, go into thonny program and change the board to ESP32 by entering Run menu and select Select interpreter… As shown in Figure 5 and after that, select the board as Micropython (ESP32) and the communication port as shown in Figure 6.
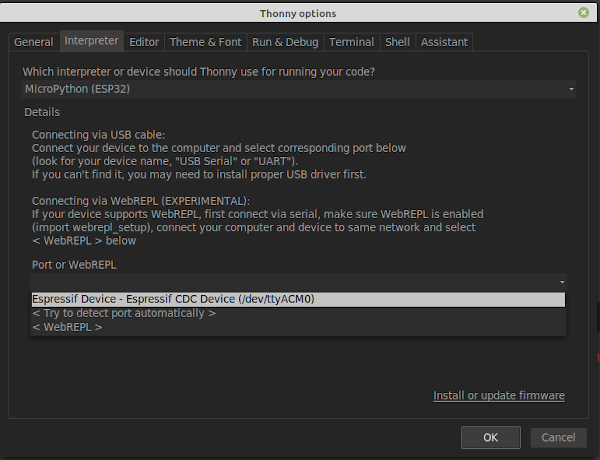
When you click the OK button and the settings are correct, the screen like Figure 6 will be displayed.
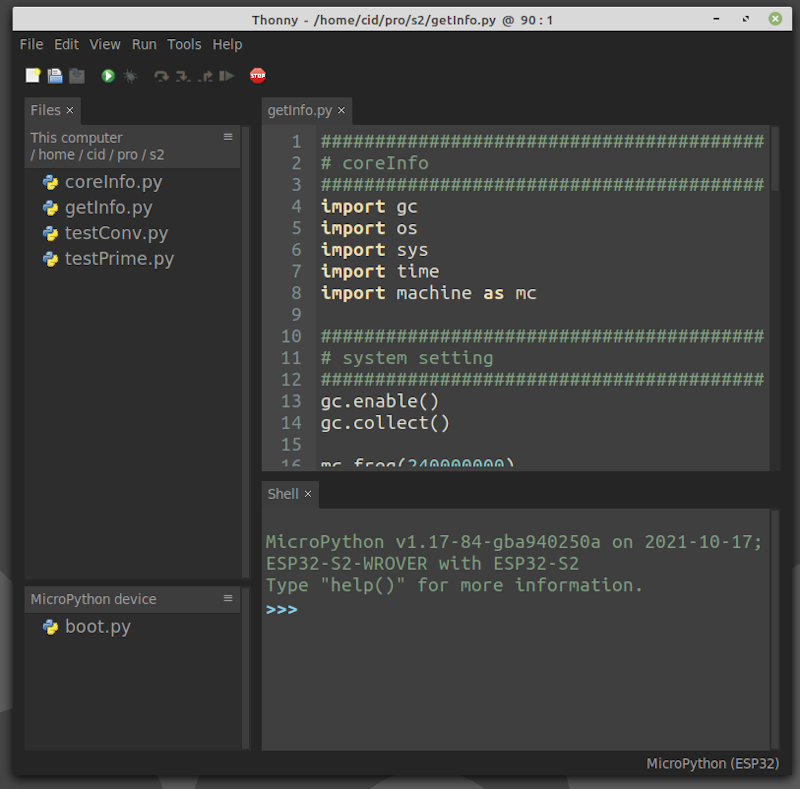
An example program to read data of Board TTGO ESP32-S2 V1.1 and try to find prime numbers can be written as follows:
##################################################################################
# coreInfo
# JarutEx (https://www.jarutex.com)
##################################################################################
import gc
import os
import sys
import time as tm
import machine as mc

##################################################################################
# system setting
##################################################################################
gc.enable()
gc.collect()

mc.freq(240000000)

##################################################################################
# show_hw_info()
##################################################################################
def show_hw_info():
    uname = os.uname()
    mem_total = gc.mem_alloc()+gc.mem_free()
    free_percent = "("+str((gc.mem_free())/mem_total*100.0)+"%)"
    alloc_percent = "("+str((gc.mem_alloc())/mem_total*100.0)+"%)"
    stat = os.statvfs('/flash')
    block_size = stat[0]
    total_blocks = stat[2]
    free_blocks  = stat[3]
    rom_total = (total_blocks * block_size)/1024
    rom_free = (free_blocks * block_size)/1024
    rom_usage = (rom_total-rom_free)
    rfree_percent = "("+str(rom_free/rom_total*100.0)+"%)"
    rusage_percent = "("+str(rom_usage/rom_total*100.0)+"%)"
    print("ID ............:",mc.unique_id())
    print("Platform ......:",sys.platform)
    print("Version .......:",sys.version)
    print("Memory")
    print("   total ......:",mem_total/1024,"KB")
    print("   usage ......:",gc.mem_alloc()/1024,"KB",alloc_percent)
    print("   free .......:",gc.mem_free()/1024,"KB",free_percent)
    print("ROM")
    print("   total ......:", rom_total,"KB" )
    print("   usage ......:", rom_usage,"KB",rfree_percent )
    print("   Free .......:", rom_free,"KB",rusage_percent )
    print("system name ...:",uname.sysname)
    print("node name .....:",uname.nodename)
    print("release .......:",uname.release)
    print("version .......:",uname.version)
    print("machine .......:",uname.machine)
    print("Frequency .....:",mc.freq())


##################################################################################
# is_prime()
##################################################################################
def is_prime(x):
    i = 2
    while (i < x):
        if x%i == 0:
            return False
        i = i+1
    if (i == x):
        return True
    return False

##################################################################################
# test_prime_number()
##################################################################################
def test_prime_number(maxN):
    counter = 0
    t0 = tm.ticks_ms()
    for n in range(2, maxN):
        if is_prime(n):
            counter+=1
    t1 = tm.ticks_ms()
    print("Found {} in {} msecs.".format(counter,abs(t1-t0)))


##################################################################################
# main program
##################################################################################
try:
    show_hw_info()
    test_prime_number(2000)
except KeyboardInterrupt:
    pass
print("end of program")
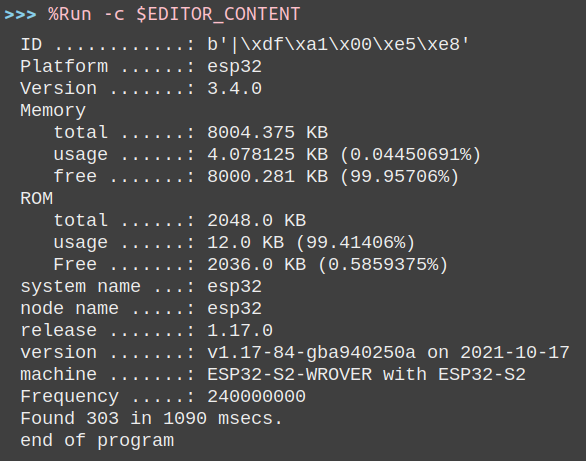
An example of the result of the work is shown in Figure 8.
Conclusion
From this article, you will find that creating a MicroPython for use with an ESP32-S2 microcontroller is the same procedure as the ESP32, but the difference is the procedure for switching the mode of operation of the USB port according to the following conditions:
- MicroPython installation must be in USB mode.
- MicroPython must be used in OTG mode.
The main programming language is still Python language like ESP32 and finally, have fun with programming.
If you want to talk with us, feel free to leave comments below!!!
References
(C) 2020-2021, By Jarut Busarathid and Danai Jedsadathitikul
Updated 2022-01-03