[EN] u8g2 Library

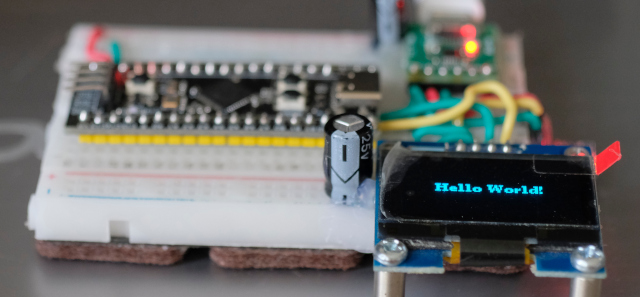
From the article on using the ESP8266 with an OLED graphical display written in Python, you’ll find that it’s fast and easy but when used with other microcontrollers that cannot use Micropython or CircuitPython, what must be done? One of the many options is the u8glib or u8g2 (Universal 8 bit Graphics Library) libraries, designed to work with monochromatic 8-bit graphics over either I2C or SPI communication. In this article, we are using I2C OLED as shown in Figure 1.

(Figure. 1 STM32F401CCU6 with I2C OLED)

[EN] ESP Class

This article is a detailed look at the ESP.h file of esp8266 Arduino to learn the functions that are very useful for programming to control the operation of this microcontroller such as knowing the amount of memory remaining or the largest memory size that can be reserved. This is used if you want to write a program that uses dynamic memory to store a list of all found APs, for example, programmers can use this class directly from the ESP object.

[TH] How to render the Thai string correctly?

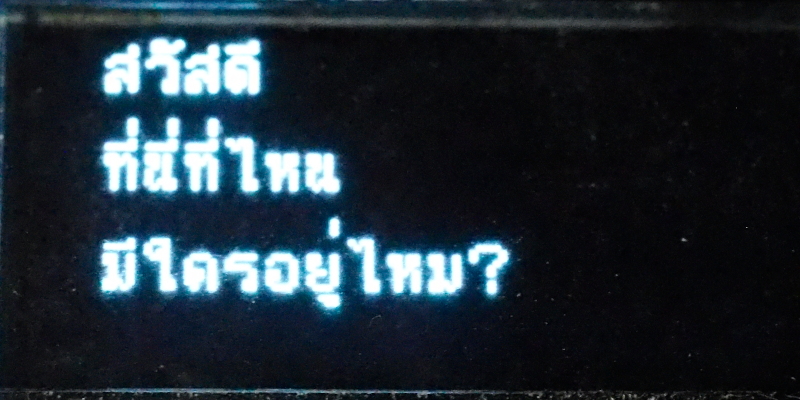
จากบทความการใช้งาน u8g2 ที่สามารถเรนเดอร์ (Render) ภาษาไทย (Thai string) ได้ผ่านทางฟังก์ชัน drawUTF8() ของไลบรารี u8g2 แต่การแสดงผลไม่ถูกต้อง ดังภาพที่ 1 ด้วยเหตุนี้จึงต้องปรับปรุงโค้ดของไลบรารีเพิ่มเติมเพื่อให้การแสดงผลถูกต้องดังภาพที่ 2

ภาพที่ 1 การแสดงผลของ drawUTF8() ก่อนปรับปรุง
ภาพที่ 2 การแสดงผลของ drawUTF8() หลังปรับปรุง

[EN] ESP8266 WebServer

This article is an experiment to make the esp8266 microcontroller a web server to display temperature and humidity values from a DHT11 sensor using the Adafruit library as shown in Figure 1. When the microcontroller is run in SoftAP mode, the client or user connects to WiFi after using the browser to access 192.168.4.1 which is the IP of esp8266.

(Figure. 1 Our equipment)

[EN] ESP-01s

This article introduces the esp8266 module named ESP-01s with 8 pin connectors, explaining the functions of each pin. Expansion of the circuit to program the chip (Example shown in Figure 1). Making the chip work and including an example of programming to use this module with Arduino to give an overview of the development of the system, which is a system that is attractively priced.

(Figure. programmed chip used with ESP-01/ESP-01s)

[EN] Arduino : ESP8266 GPIO

In this article, we will learn about GPIO (General Purpose I/O) or pin connect to an external device of microcontroller with C++ of Arduino using esp8266 as reference chip. This can be applied to Arduino Uno, Arduino Mega or STM32 as well. Under this article, we describe the duty of the pin,  output and the input signal.

(Figure. 1 GPIO of WeMos D1)

[EN] ESP8266WiFi

This article is a compilation of information related to the ESP8266WiFi class, which performs the WiFi functionality of the ESP8266 microcontroller. This class can be accessed via a WiFi object, which is an object created for accessing the chip’s wireless module and must import a header file named ESP8266WiFi.h

[EN] WiFiServer

After studying the ESP8266WiFi to control the microcontroller connected to a wireless network in an STA and SoftAP form, then learned how to use the WiFiClient to use the esp8266 as a client node. This time, it’s about WiFiServer to make esp8266 act as a service node or Server. The example in this article is to create an internal network system by using 3 esp8266 to act as SoftAP, Server and Client as shown in Figure 1.